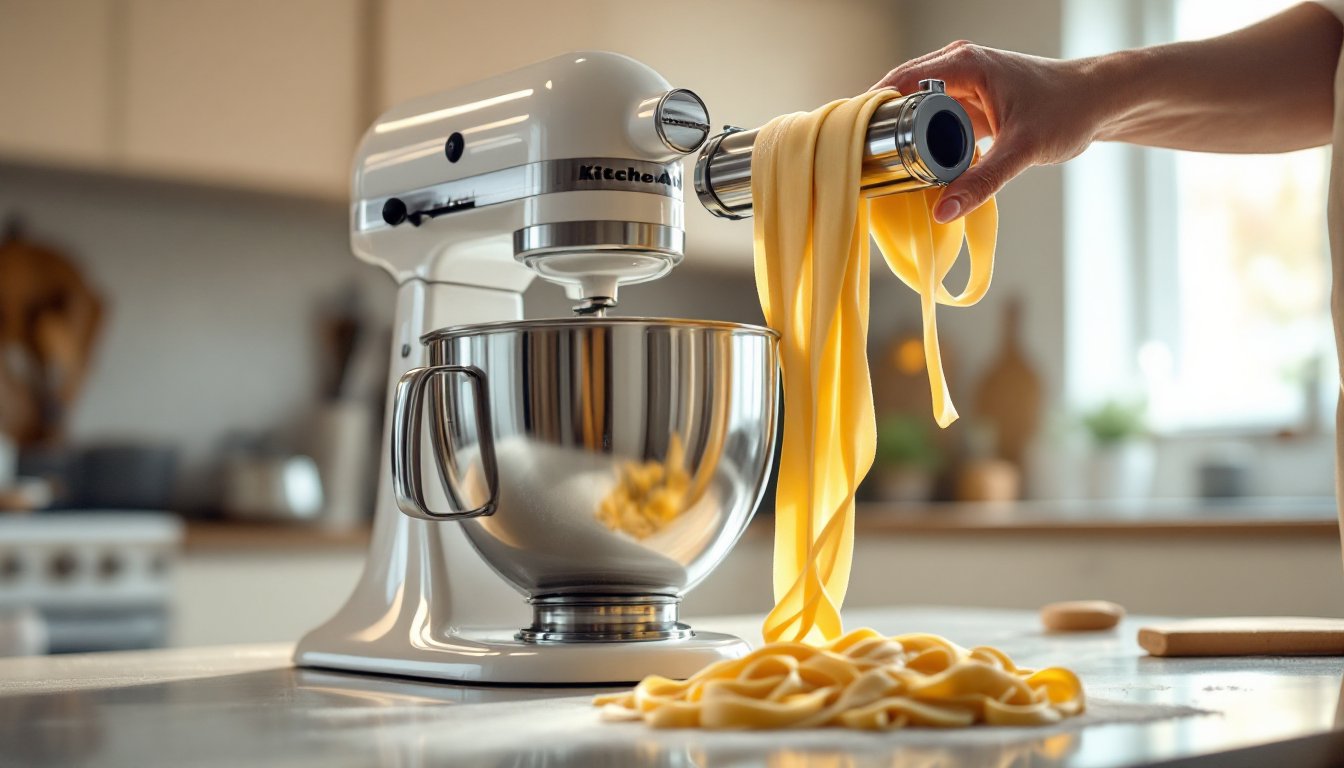
If you’ve invested in a KitchenAid stand mixer, you’ve already got one of the best kitchen workhorses available. But most home cooks don’t realize how much further they can push that machine with the right attachments. A pasta attachment for a KitchenAid mixer transforms your mixer from a dough-mixing station into a full pasta-making operation. Whether you’re rolling fettuccine by hand or looking to streamline fresh pasta production, understanding your pasta attachment options makes the difference between a dusty kitchen gadget and a tool that actually gets used. This guide walks you through the types available, installation, and how to pick the right one for your cooking style.
Table of Contents
ToggleKey Takeaways
- A pasta attachment for a KitchenAid mixer transforms your stand mixer into a full pasta-making operation by replacing the flat mixing paddle with rollers or extruders.
- Roller attachments are more versatile and beginner-friendly for making fettuccine, pappardelle, and lasagna sheets, while extruders create long, thin pasta like spaghetti and linguine but require precise dough hydration.
- Installation takes less than a minute: unplug the mixer, remove the power hub cover, slide the attachment onto the drive shaft, and secure the cover—no special tools needed.
- Roller dough should be rolled through 2–3 passes at widening gaps on low speed, while extruder dough requires higher hydration and produces delicate pasta that needs 30+ minutes of drying time.
- Never submerge your pasta attachment in water; instead, wipe it clean immediately after use with a damp cloth and store it in a dry location to prevent rust and maintain peak performance for years.
- Choose between a roller or extruder based on your actual pasta preferences and mixer horsepower, as basic roller sets cost $40–$80 while extruder die sets can exceed $120.
What Is a Pasta Attachment for a KitchenAid Mixer?
A pasta attachment is a specialized accessory that clips onto the power hub of your KitchenAid stand mixer, replacing the flat mixing paddle. Instead of mixing dough by hand or feeding it through a separate pasta machine, the attachment does the work for you. The mixer provides consistent pressure and speed, which means more uniform pasta thickness and less manual labor.
These attachments come in two main styles: rollers and extruders. Rollers flatten and shape dough into sheets for lasagna, fettuccine, or pappardelle. Extruders push dough through shaped dies to create spaghetti, penne, or rigatoni. Most KitchenAid pasta attachments are made from plastic housing with stainless steel or plastic rollers and dies, designed to withstand repeated use without warping.
The real convenience factor is that you can mix your pasta dough in the mixer bowl, then swap the paddle for your pasta attachment and keep going. No transferring dough to another machine, no hand-cranking, and no worrying about the dough sticking to metal parts. It’s a straightforward, integrated workflow that saves time, especially when you’re making pasta for a crowd.
Types of Pasta Attachments Available
KitchenAid offers a range of pasta attachments, and knowing the difference between them is key to getting the results you want.
Fettuccine and Pappardelle Rollers
Roller attachments are the most versatile option for most home cooks. The roller-and-cutter set consists of a smooth roller that flattens dough to your desired thickness, paired with cutting dies for either fettuccine (about ¼-inch noodles) or pappardelle (wide, flat ribbons, roughly ¾-inch). Some combo kits include both cutters so you can switch between them.
Rollers work by feeding dough between two smooth cylinders. You control thickness by adjusting the gap between the rollers, wider gaps create thicker pasta, tighter gaps make thinner sheets. Once you’ve rolled the dough to your liking, you flip a lever to engage the cutting die, and out comes uniform noodles. The attachment handles the consistency that’s almost impossible to achieve by hand with a standard pasta machine. If you enjoy fresh lasagna sheets or wide ribbon pastas, this is your workhorse.
Spaghetti and Linguine Extruders
Extruder attachments are the other major category. These push soft dough through metal or plastic dies shaped like your target pasta, spaghetti, linguine, bucatini, and more, depending on the die set. The ravioli maker attachment is a specialized extruder variant that creates filled pasta pockets in one pass, though it requires more finesse.
Extruders typically come with interchangeable dies that snap into the housing. You load dough into a hopper, and the attachment slowly extrudes it at a consistent rate. The result is pasta that’s uniform in diameter and texture. Many home cooks find extruders slightly less intuitive than rollers because the dough consistency has to be just right, too wet and it clogs the die, too dry and it crumbles. But once you dial in your dough hydration, extruders make exceptional spaghetti and linguine. According to detailed reviews of the best KitchenAid attachments, extruders are a favorite for serious pasta enthusiasts.
How to Install and Use Your Pasta Attachment
Installation is straightforward and takes less than a minute. First, make sure your mixer is unplugged and the bowl is removed. Locate the power hub on the side of your mixer, it’s the round opening covered by a flat metal plate with a notch. Twist and pull the plate counterclockwise to remove it. Your pasta attachment should slide straight onto the drive shaft until it clicks or seats snugly. Replace the cover plate, twist it clockwise until it’s flush, and you’re done.
Usage depends on your attachment type. For rollers, mix your pasta dough in the bowl until it comes together (you should have a shaggy, slightly sticky mass). Reattach the bowl to the mixer. Select a low speed (usually Speed 1 or 2 on most KitchenAid models) to avoid overworking the dough. Feed a chunk of dough into the roller attachment’s opening, and it’ll flatten as it passes through. On the first pass, the dough will likely be thick and ragged, this is normal. Run it through 2–3 more times, widening the gap slightly each time, until it reaches your target thickness.
For extruders, your dough should be more hydrated and slightly softer than roller dough, but still cohesive. Load it into the hopper and run the mixer at Speed 1. The attachment will slowly push dough out through the die. Be patient, extruded pasta doesn’t rush. Use a knife or pasta cutter to snip individual pieces as they emerge. Fresh extruded pasta is delicate, so handle it gently and dry it on a flat sheet or drying rack for at least 30 minutes before cooking.
Always wear safety glasses when using any mixer attachment, especially when feeding dough into rollers, hands and loose sleeves should never come near moving machinery. Keep hair tied back.
Choosing the Right Pasta Attachment for Your Needs
Decide between a roller and an extruder based on the types of pasta you actually make. Roller attachments are ideal if you’re into lasagna, fresh fettuccine, pappardelle, or ravioli. They’re more forgiving with dough hydration and faster, you can roll out multiple sheets in minutes. Extruders excel if you want long, thin pasta like spaghetti or linguine, but they require a steeper learning curve and take longer to produce results.
Consider your mixer’s horsepower. Older or smaller KitchenAid models (like the artisan series) may struggle with very stiff dough pushed through an extruder die. Roller attachments are gentler on the motor. If you have a commercial-grade mixer or a larger NSF-rated model, extruders are less of a concern.
Budget matters too. Kitchen design and appliance reviews often highlight that a basic roller set runs $40–$80, while extruder die sets with multiple shapes can reach $120 or more. Combo kits that include both a roller and an extruder are available but cost more upfront. Decide what you’ll actually use before spending big, a fancy extruder collecting dust in a cabinet isn’t a good investment.
Also check compatibility. KitchenAid pasta attachments are generally universal across their stand mixer line, but always confirm your specific model accepts them. Older or specialty mixers (bowl-lift artisan models from the early 2000s, for example) may not have compatible drive hubs. Your mixer’s manual or KitchenAid’s website will clarify.
Maintenance and Care Tips for Long-Lasting Performance
Pasta attachments are simple tools, but they need basic care to perform year after year. Never submerge them in water or put them in the dishwasher, this will damage the gearbox and cause rust on metal components. Instead, disassemble them according to the manual and wipe rollers and dies with a damp cloth immediately after use, while dough is still soft and easy to remove. If dough dries on the attachment, soak it in warm water for 10 minutes, then use a soft brush or cloth to clean it out.
Store the attachment in a dry location, preferably in its original box or a sealed plastic bag with a silica gel packet to prevent moisture buildup. Check the drive shaft on your mixer for any residual dough particles and wipe it clean before reattaching the power hub cover. Every few months, apply a tiny drop of food-grade mineral oil to any pivot points or moving parts to keep them smooth, check your manual for specific lubrication points.
If dough starts sticking more than usual or the attachment becomes sluggish, it’s likely a buildup issue rather than a mechanical failure. A thorough cleaning with warm water and a soft brush usually restores performance. According to home improvement resources at Better Homes & Gardens, proper maintenance of small kitchen appliances can extend their useful life by years. Treat your pasta attachment the same way, and it’ll churn out fresh pasta for a decade or more.